There will be times when you need to move WordPress websites to a new host. It’s hopefully something you shouldn’t need to do very often as any change has the potential to cause a little disruption. However, if handled properly, it should be a seamless transition giving you the benefit of using a new web host that provides a more reliable, faster server, better value for money or both.
Essential groundwork
There are a number of essential pieces of information that you need before moving your WordPress website to a new web host.
- Access to the Domain name control panel so you can change the nameservers.
- Access to the old web hosting Control Panel so you can download files, and MySQL database.
- Access to the WordPress Dashboard of the current website.
- Access to the new web hosting Control Panel so you can upload the files and import the database.
- Use of an FTP program and FTP access to the new and old web hosting – we use FileZilla.
Without access to any of the above then you cannot move your website to a web host. It’s also essential that the new web server has the classic LAMP combination: Linux, Apache (web server), MySQL and PHP. This is all standard and commonly available but it is worth checking.
Once you have everything in place then you can move your website to a new web host.
Moving WordPress websites to a new web host with no URL change
These are the steps you need to take if you simply want to move your WordPress website to a new web host without a change to the URL:
- Download all your website files using your FTP program or create a zip file using the web hosting control panel and download that to your PC.
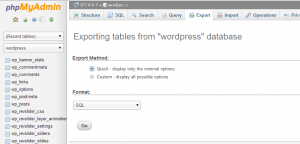
- Export the database through phpMyAdmin

- Login to phpMyAdmin and select your WordPress Database.
- Once you have selected the Database, click the tab called “Export”.
- Choose a method of compression method (preferred gzip), and click the Execute button
- You will see a message in your browser that will ask you to Download this file, click Yes and you will have a backup to your Database now.
- Upload the zip file from your PC to the public_html folder or using an FTP program or the File Manager in the new web hosting Control Panel – if it is a very large file then you may have to unzip the file on your PC and use your FTP program to copy the files and folder over.
- Unzip the file in the Control Panel File Manager, ensuring that the destination is the root of the public_html folder.
- Use phpMyAdmin to create a blank database with the same name and user details (username and password) as the WordPress database on the old web hosting.
- Go to the database in Import the zip file of the database backup.
- If it has run properly then the tables should have been created.
- Check and compare with the old database.
- Finally go to the Domain name control panel and change the nameservers so they point at the new web hosting.
- Once the nameserver changes have propagated (it can take up to 24 hours) your WordPress website should be present and working at your new web hosting.
Here are some other issues you need to consider:
- Email accounts – there is likely to be email accounts associated with the hosting which will need to be moved as well. We will cover this in a future blog post as you will lose access to the archive of past emails if you don’t download the emails first.
- Plugin incompatibility – if there are issues with plugins then simply disable the offending plugin in Dashboard > Plugins. You may need to turn on error reporting display to find the source of the error – see our earlier blog posting on fixing the WordPress white screen of death.
- If the domain name changes or you want to change the folder or use a different database name and password then you will need to edit the wp-config.php file to reflect these changes. This is outside the scope of this blog post but covered in our further reading links.
Further reading
How to make a WordPress database backup manually


